This post contains affiliate links. As an Amazon Associate, we earn from qualifying purchases. This means we may earn a small commission if you purchase through our links, at no extra cost to you.
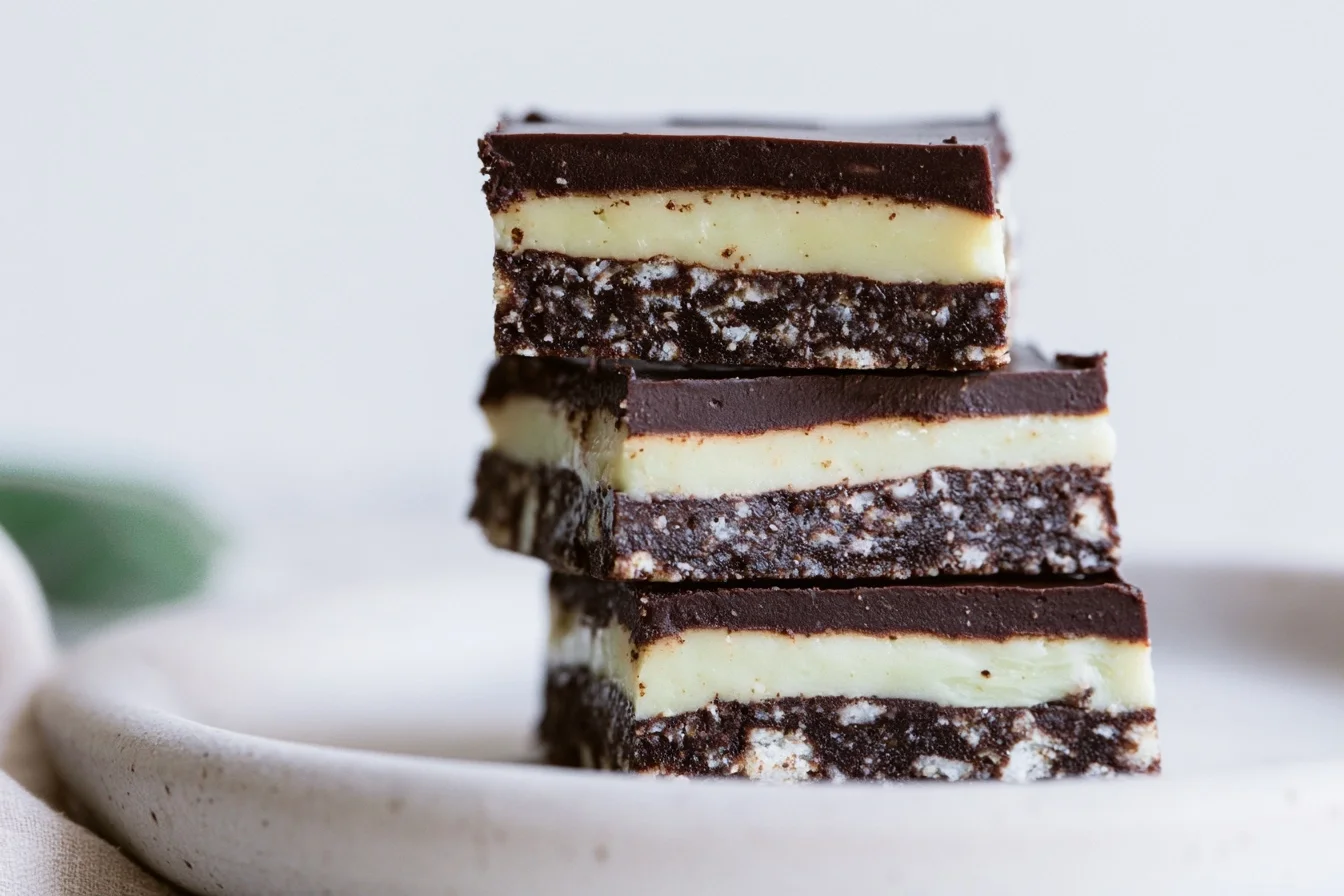
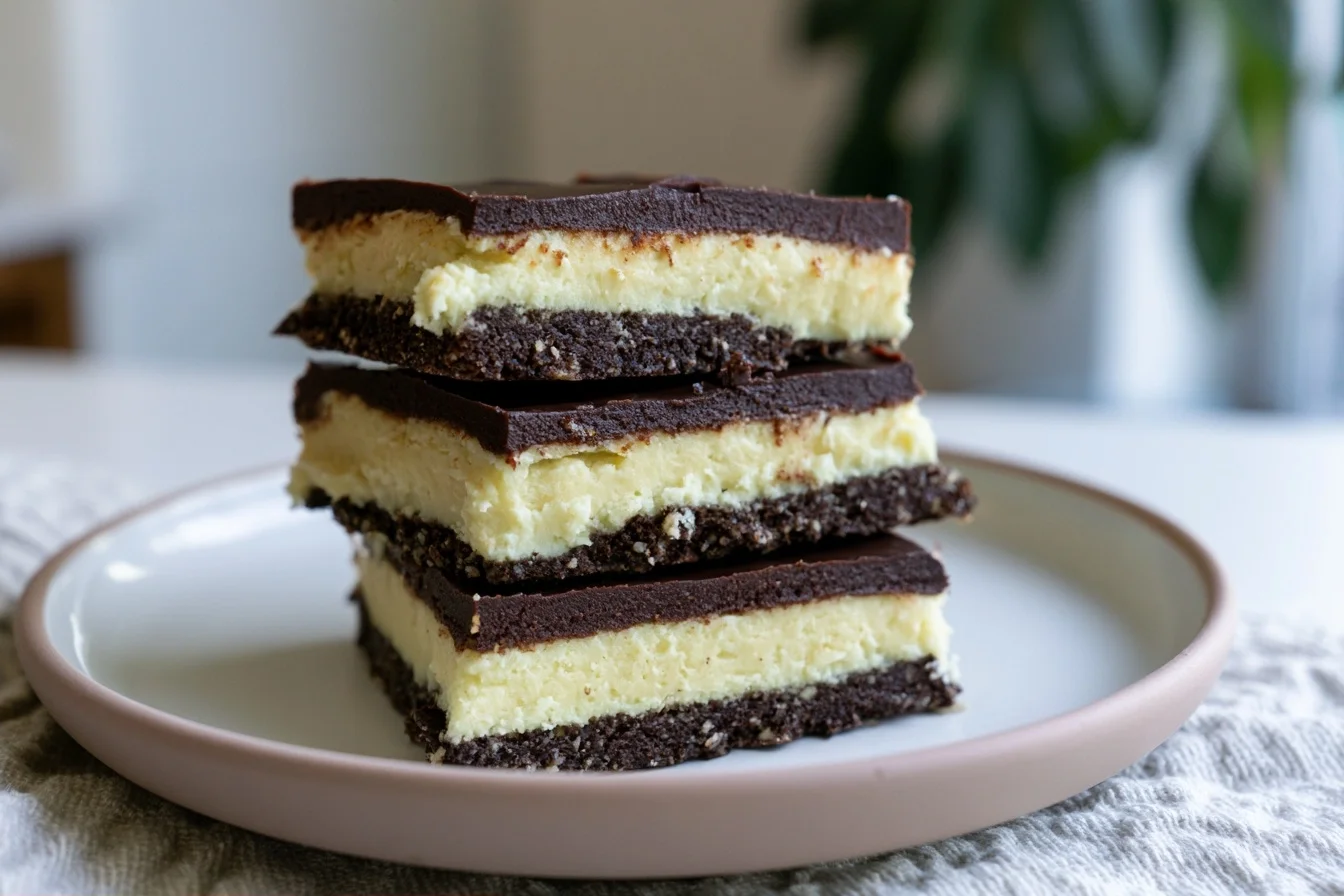
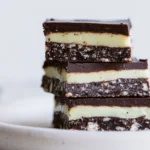
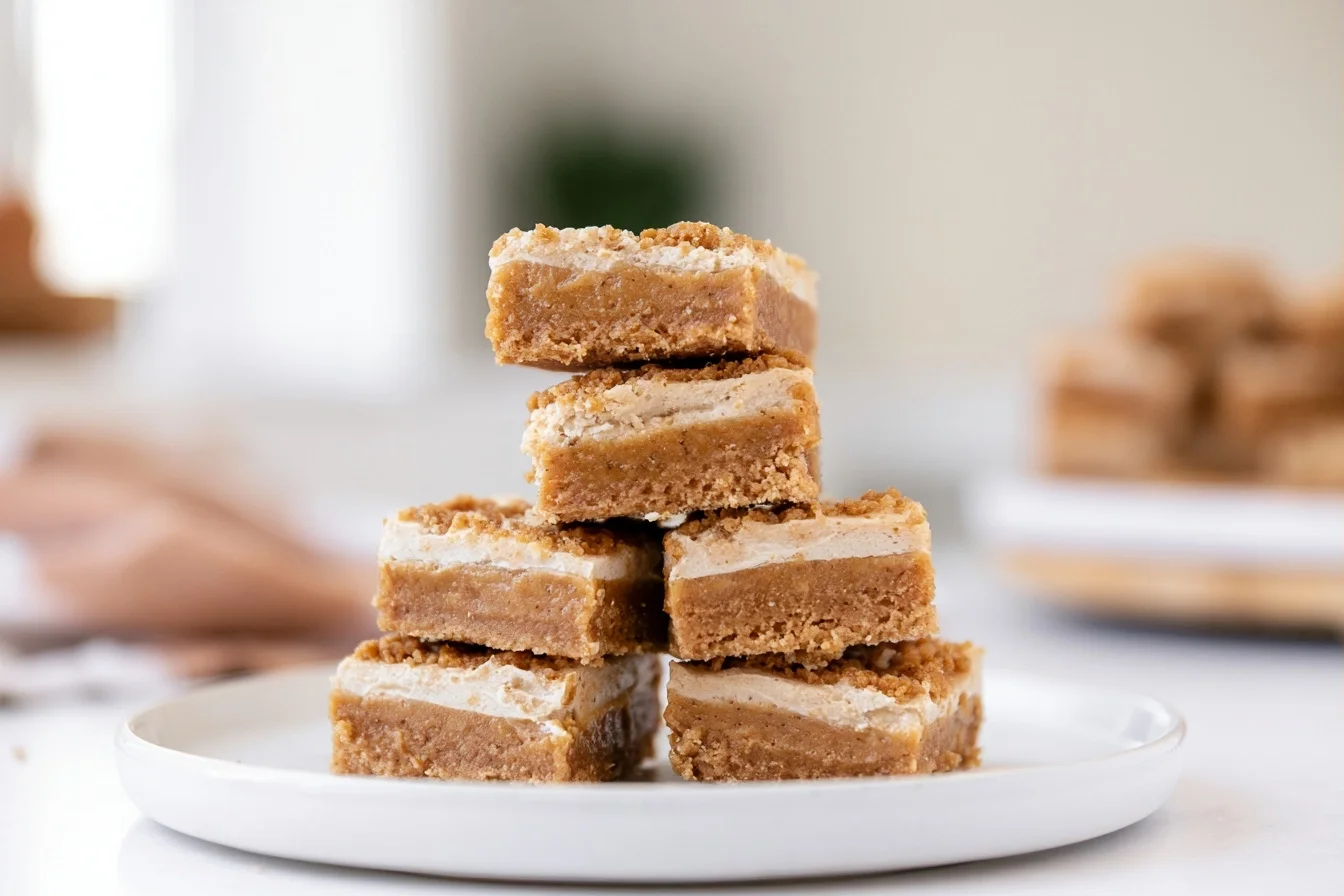
If you’ve ever tasted the iconic Canadian treat, you know there’s something magical about those three distinct layers. Today, I’m thrilled to share my keto nanaimo bars recipe that captures all that nostalgic goodness without the sugar crash. These no-bake beauties feature a rich chocolate coconut base, a creamy custard-flavored middle, and a glossy chocolate topping that’ll make you forget they’re low-carb.
I first discovered Nanaimo bars during a trip to Vancouver years ago, and I’ve been obsessed ever since. However, the traditional version is loaded with graham crackers, powdered sugar, and corn syrup. Therefore, I set out to create a keto-friendly version that honors the original while keeping carbs in check. The result? A dessert so decadent that even my non-keto friends can’t tell the difference.
These bars are perfect for holiday gatherings, potlucks, or whenever you need an impressive dessert that requires zero oven time. In addition, they store beautifully in the fridge for up to two weeks, making them ideal for meal prep. Let me show you how simple it is to create this stunning three-layer masterpiece.
Why You’ll Love This Recipe
- No baking required – just chill and serve
- Only 3g net carbs per bar
- Three stunning layers that taste like the classic
- Stores perfectly in the fridge for up to 2 weeks
- Impressive presentation with minimal effort
Your New Favorite No-Bake Keto Treat
Keto Nanaimo Bars
16
servings30
minutes0
minutes245
kcalThese no-bake keto nanaimo bars feature three decadent layers: a chocolate coconut base, creamy custard middle, and glossy chocolate topping. With only 3g net carbs per bar, they’re the perfect low-carb version of the classic Canadian treat.
Ingredients
1 cup almond flour
1 cup unsweetened shredded coconut
1/3 cup unsweetened cocoa powder
1/3 cup powdered erythritol
1/2 cup butter
1/2 cup butter
1.5 cups powdered erythritol
2 tablespoons heavy cream
2 tablespoons sugar-free vanilla custard powder
1 cup sugar-free dark chocolate chips
2 tablespoons butter
1 pinch sea salt
Directions
- Line an 8×8 inch baking pan with parchment paper, leaving overhang on the sides for easy removal.
- Combine almond flour, shredded coconut, cocoa powder, and 1/3 cup powdered erythritol in a medium bowl and mix well.
- Pour in the melted butter and stir until the mixture is fully combined and resembles wet sand.
- Press the mixture firmly into the bottom of the prepared pan using a flat-bottomed glass or measuring cup to create an even layer.
- Refrigerate the base layer for at least 30 minutes while you prepare the custard layer.
- Beat the softened butter with an electric mixer until light and fluffy, about 2-3 minutes.
Notes
- For cleanest cuts, run your knife under hot water and wipe dry between each slice.
- If you can’t find sugar-free custard powder, use 2 teaspoons vanilla extract plus 1 tablespoon of additional powdered erythritol.
- Store bars in an airtight container in the refrigerator for up to 2 weeks or freeze for up to 3 months.
Nutrition Facts
- Serving Size: 1 g
- Total number of serves: 16
- Calories: 245kcal
- Fat: 23g
- Carbohydrates: 7g
- Fiber: 4g
- Protein: 4g
Like this recipe?
Follow @easyketodessert on Pinterest
Expert Tips for Perfect Keto Nanaimo Bars
Making these bars is straightforward, but a few key techniques will ensure your layers turn out perfectly every time. First, pay attention to temperatures and chilling times. Then, follow these specific tips for each layer to achieve that classic texture and appearance.
Getting the Base Layer Just Right
The bottom layer should be firm but not rock-hard. Press the mixture evenly into your pan using a flat-bottomed glass or measuring cup. This creates a smooth surface for the custard layer. As a result, your bars will have clean, professional-looking edges when sliced.
Make sure your coconut oil is melted but not hot when mixing the base. Hot oil can cause the sweetener to clump. For best results, use finely shredded unsweetened coconut rather than large flakes. The finer texture mimics traditional graham cracker crumbs more closely.
Mastering the Custard Middle Layer
The custard layer needs to be thick enough to support the chocolate topping. Beat the butter until it’s light and fluffy before adding other ingredients. This incorporates air and creates that signature smooth, creamy texture. Therefore, don’t rush this step.
Room temperature butter is essential here. Cold butter won’t cream properly and will leave lumps. In addition, sift your powdered sweetener to avoid any grittiness. If you want an even smoother result, try using super-fine powdered erythritol designed specifically for frosting applications.
Creating a Glossy Chocolate Topping
The chocolate layer should be smooth and shiny, not dull or grainy. Melt your chocolate and butter together gently, either in the microwave in 20-second bursts or over a double boiler. Stir constantly to prevent overheating. For example, overheated chocolate can seize and become unusable.
Let the chocolate mixture cool slightly before pouring it over the custard layer. If it’s too hot, it can melt the custard underneath. Spread it quickly but gently with an offset spatula for the smoothest finish. Similar techniques work beautifully for layered cookie bars too.
Slicing and Serving Like a Pro
Clean cuts make all the difference in presentation. Run your knife under hot water and wipe it dry between each cut. This prevents the chocolate from cracking and keeps the layers distinct. As a result, you’ll get bakery-quality slices every time.
Chill the bars completely before cutting, ideally for at least 4 hours or overnight. However, let them sit at room temperature for about 5 minutes before slicing. This slight softening makes cutting easier while keeping the layers intact.
Creative Variations to Try
Once you’ve mastered the classic version, these variations let you customize your keto nanaimo bars to suit different tastes and dietary needs. Each adaptation maintains the signature three-layer structure while adding unique flavors. Therefore, you can make these bars again and again without getting bored.
Mint Chocolate Version
Add 1/2 teaspoon of peppermint extract to the custard layer for a refreshing twist. You can also add a few drops of green food coloring if desired. This variation tastes incredible during the holidays and pairs wonderfully with coffee. In addition, the mint complements the rich chocolate layers beautifully.
Mocha Nanaimo Bars
Dissolve 1 tablespoon of instant espresso powder in the melted butter for the base layer. Then add another teaspoon to the custard layer. This creates a sophisticated coffee-chocolate combination that adult guests will love. The coffee flavor enhances the chocolate without overpowering it.
Dairy-Free Adaptation
Replace the butter with coconut oil in all three layers. Use coconut cream instead of heavy cream in the custard layer. For the chocolate topping, choose dairy-free chocolate chips. The texture will be slightly different but equally delicious. However, note that coconut oil sets firmer than butter when chilled.
Nut-Free Option
Substitute the almond flour with sunflower seed flour in a 1:1 ratio. Use the same amount of shredded coconut. The flavor will be slightly different but still delicious. This makes the bars safe for those with tree nut allergies while maintaining the proper texture.
Different Sweetener Options
While erythritol works beautifully, you can use other keto sweeteners. Allulose provides excellent texture without any cooling effect. Monk fruit sweetener blends also work well. However, avoid straight stevia as it’s too concentrated and can taste bitter. For more guidance on choosing sweeteners, check out this comprehensive sweetener guide.
If you enjoy experimenting with flavors, you might also love trying tangy citrus-based bars or rich chocolate fudge recipes for more no-bake options.
Understanding the Nutrition
Each bar contains approximately 245 calories, making them a satisfying treat that fits easily into your daily macros. The high fat content comes primarily from coconut, butter, and chocolate, providing 23 grams of healthy fats per serving. This fat content helps keep you satiated and supports ketogenic nutritional goals beautifully.
With only 3 grams of net carbs per bar, these treats won’t kick you out of ketosis. The total carb count is 7 grams, but 4 grams come from fiber, primarily from the almond flour and coconut. Therefore, the net carb calculation is straightforward and accurate.
Each serving provides 4 grams of protein, which isn’t substantial but adds to your daily intake. The sugar content is minimal at just 1 gram per bar, coming naturally from the cocoa powder and coconut. However, remember that sugar alcohols from erythritol don’t count toward net carbs as they’re not absorbed by the body.
These bars are nutrient-dense thanks to the almond flour and coconut. You’ll get small amounts of vitamin E, magnesium, and healthy medium-chain triglycerides from the coconut. In addition, the dark chocolate provides antioxidants. While dessert shouldn’t be your primary nutrition source, it’s nice when treats offer some beneficial nutrients.
The portion size of one bar (about 2×2 inches) is generous and satisfying. However, because they’re so rich, many people find half a bar perfectly adequate. If you cut smaller portions, you can reduce the calorie and carb counts accordingly. This makes them even more flexible for different macro targets.
Your Questions Answered
Over the years, I’ve received countless questions about making these keto nanaimo bars. Below, I’ve compiled the most common concerns and detailed answers to help you achieve perfect results every single time. These tips address storage, substitutions, and troubleshooting issues that might arise.
Can I freeze keto nanaimo bars?
Yes, these bars freeze beautifully for up to 3 months. Wrap them individually in plastic wrap, then place in a freezer-safe container. Thaw in the refrigerator overnight before serving. The texture remains perfect after freezing.
Why is my custard layer too soft?
The custard layer needs sufficient chilling time to firm up properly. Make sure you refrigerate for at least 2 hours before adding the chocolate layer. Also, ensure your butter was properly creamed and your powdered sweetener was fully incorporated. Using room temperature butter is essential.
Can I use coconut flour instead of almond flour?
Coconut flour is much more absorbent than almond flour, so it’s not a direct substitute. If you must use it, use only 1/3 cup coconut flour instead of 1 cup almond flour. However, the texture will be different and may not hold together as well.
What’s the best chocolate for the topping?
Use sugar-free dark chocolate chips with at least 85% cocoa content. Lily’s and ChocZero are excellent brands. Avoid chocolate with maltitol as it can cause digestive issues and has a higher glycemic impact than other sugar alcohols.
How long do these bars last in the fridge?
Stored in an airtight container in the refrigerator, keto nanaimo bars stay fresh for up to 2 weeks. Keep them covered to prevent the chocolate from absorbing odors. They actually taste even better after a day or two as the flavors meld together.
Can I make these bars ahead for a party?
Absolutely! These are perfect make-ahead desserts. Prepare them up to 5 days in advance and store in the refrigerator. Cut them into bars the day of serving for the cleanest edges. Let them sit at room temperature for 5 minutes before serving for the best texture.
Leave a Reply