This post contains affiliate links. As an Amazon Associate, we earn from qualifying purchases. This means we may earn a small commission if you purchase through our links, at no extra cost to you.
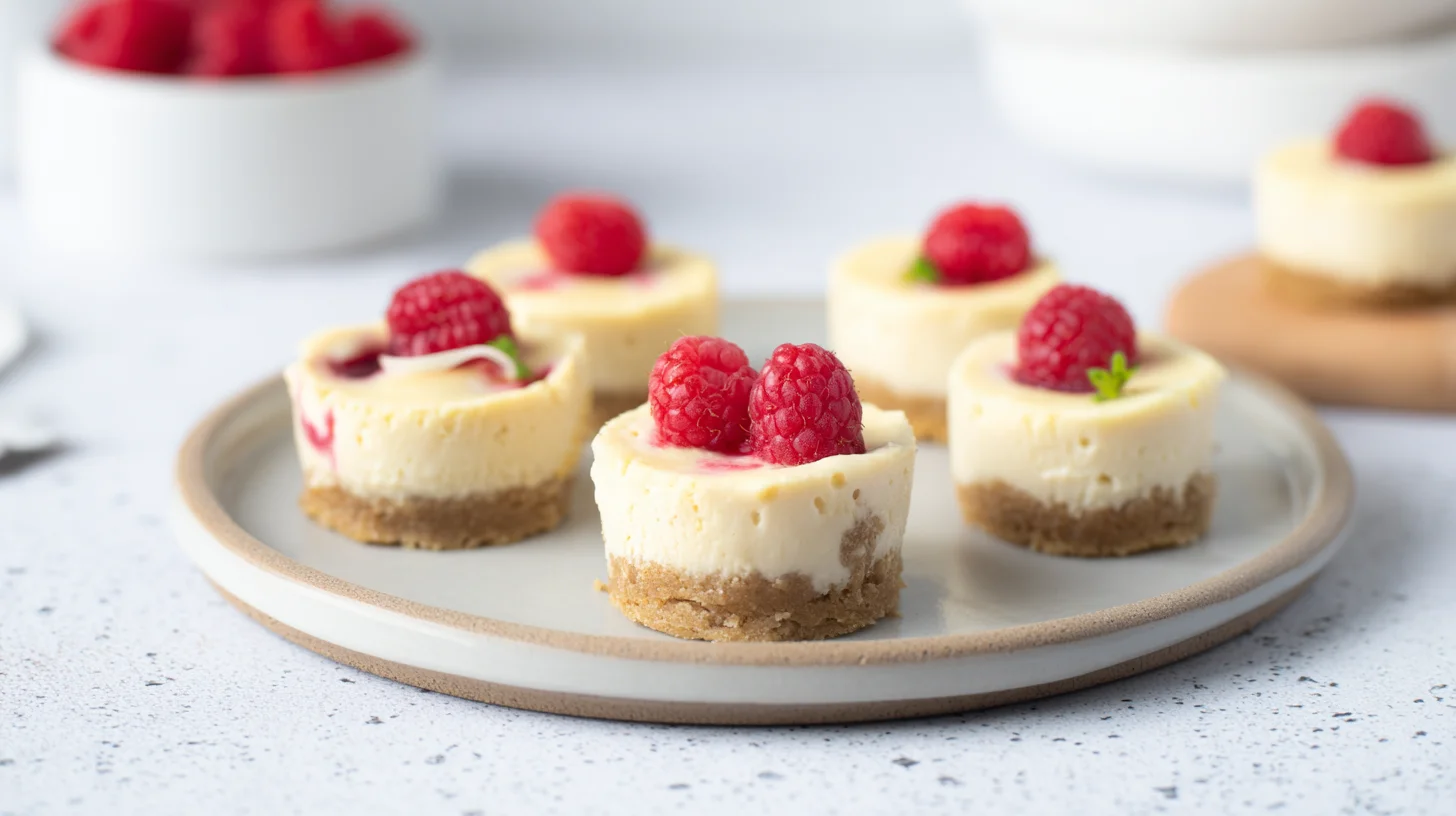
If you’re looking for a simple, elegant dessert that won’t derail your keto lifestyle, these Keto Cheesecake Cups are about to become your new best friend. They’re creamy, rich, and perfectly portioned for when you need a sweet treat without the guilt. Plus, they look absolutely gorgeous on any dessert table.
I first made these individual cheesecake cups for a family gathering last summer. Everyone kept asking for the recipe, and nobody could believe they were sugar-free. The best part? You don’t need any special baking skills or fancy equipment. Just a muffin tin, some cream cheese, and about 30 minutes of your time.
These mini cheesecakes are incredibly versatile too. Serve them at dinner parties, pack them for meal prep, or keep them in the fridge for those late-night dessert cravings. They’re also freezer-friendly, which means you can always have a stash ready to go.
Why You’ll Love This Recipe
- Ready in just 30 minutes with minimal hands-on time
- Only 3g net carbs per serving
- Perfectly portioned individual servings
- No water bath required unlike traditional cheesecake
- Freezer-friendly for make-ahead convenience
Your New Go-To Mini Cheesecake Recipe
Keto Cheesecake Cups
12
servings15
minutes20
minutes220
kcalThese individual keto cheesecake cups feature a buttery almond flour crust and a rich, creamy filling sweetened with erythritol. They’re perfectly portioned, easy to make, and contain just 3g net carbs per serving.
Ingredients
1.5 cups almond flour
3 tablespoons butter
2 tablespoons powdered erythritol
16 ounces cream cheese
0.5 cup powdered erythritol
2 large eggs
0.25 cup sour cream
1 teaspoon vanilla extract
1 tablespoon lemon juice
0.125 teaspoon salt
1 cup whipped cream
0.25 cup fresh berries
Directions
- Preheat your oven to 325°F and line a 12-cup muffin tin with parchment paper liners or silicone cups.
- Mix the crust ingredients by combining almond flour, melted butter, and 2 tablespoons of powdered erythritol in a bowl until the mixture resembles wet sand.
- Press the crust into the bottom of each muffin cup, using about 1 tablespoon per cup, and press down firmly with your fingers or the back of a spoon.
- Beat the cream cheese in a large bowl with an electric mixer on medium speed until smooth and fluffy, about 2 minutes.
- Add the sweetener and continue beating until well combined and no lumps remain.
- Mix in the eggs one at a time on low speed, mixing just until incorporated after each addition.
Notes
- Store leftovers covered in the refrigerator for up to 5 days.
- These cheesecake cups freeze beautifully for up to 3 months. Thaw overnight in the refrigerator before serving.
- Make sure all ingredients are at room temperature for the smoothest, creamiest texture.
- The centers should still jiggle slightly when done baking. They will firm up as they cool.
- For best results, use parchment paper or silicone liners for easy removal from the muffin tin.
Nutrition Facts
- Serving Size: 1 g
- Total number of serves: 12
- Calories: 220kcal
- Fat: 20g
- Carbohydrates: 5g
- Fiber: 2g
- Protein: 5g
Like this recipe?
Follow @easyketodessert on Pinterest
Tips for Perfect Keto Cheesecake Cups
Making these cheesecake cups is straightforward, but a few key techniques will take them from good to absolutely incredible. Therefore, I’m sharing my favorite tips that I’ve learned through countless batches. These tricks ensure your cheesecakes turn out smooth, creamy, and crack-free every single time.
Use Room Temperature Ingredients
This is the most important tip for silky smooth cheesecake filling. Take your cream cheese and eggs out of the refrigerator at least an hour before you start baking. Cold ingredients create lumps that are nearly impossible to mix out. Room temperature cream cheese blends effortlessly, creating that luxurious texture everyone loves.
Don’t Overmix the Batter
Once you add the eggs, mix just until combined. Overmixing incorporates too much air into the batter, which can cause cracks as the cheesecakes bake. Use a low speed on your mixer and stop as soon as everything looks uniform. In addition, scrape down the sides of the bowl to ensure even mixing without overworking the batter.
Line Your Muffin Tin Properly
Use parchment paper liners or silicone muffin cups for the easiest removal. Regular paper liners can stick to the cheesecake, making them difficult to peel off cleanly. However, if you only have standard liners, lightly spray them with cooking oil first. For the best results, I recommend these reusable silicone baking cups that pop out perfectly every time.
Watch for the Perfect Doneness
The centers should still jiggle slightly when you remove them from the oven. They’ll continue cooking as they cool and will set completely in the refrigerator. Overbaked cheesecakes become dry and grainy. As a result, set a timer and check them a few minutes before the recommended baking time ends.
Cool Gradually to Prevent Cracks
Let the cheesecakes cool in the turned-off oven with the door slightly open for about 10 minutes. This gradual temperature change prevents sudden contraction that causes cracks. Then, move them to a wire rack to cool completely before refrigerating. Patience here really pays off with beautiful, smooth tops.
Delicious Variations to Try
One of the best things about this recipe is how easily you can customize it. Once you master the basic technique, you can create endless flavor combinations. Therefore, I’m sharing my favorite variations that keep these mini cheesecakes exciting.
Chocolate Lover’s Version
Add 3 tablespoons of unsweetened cocoa powder to the cream cheese mixture for rich chocolate cheesecake cups. You can also fold in sugar-free chocolate chips for extra decadence. For an even more intense chocolate experience, top them with sugar-free chocolate chips before baking. This variation pairs beautifully with the almond flour crust.
Berry Swirl Cheesecakes
Reserve a quarter cup of the cheesecake batter and mix it with 2 tablespoons of sugar-free berry jam. Drop small spoonfuls onto each cheesecake cup and swirl with a toothpick. Fresh strawberries work wonderfully here, just like in this strawberry cheesecake variation. The vibrant swirls make them look bakery-quality.
Lemon Cheesecake Cups
Add 2 tablespoons of fresh lemon juice and 1 tablespoon of lemon zest to the filling. This creates a bright, refreshing flavor that’s perfect for spring and summer gatherings. The citrus cuts through the richness beautifully. In addition, you can top them with a dollop of sugar-free lemon curd for extra zing.
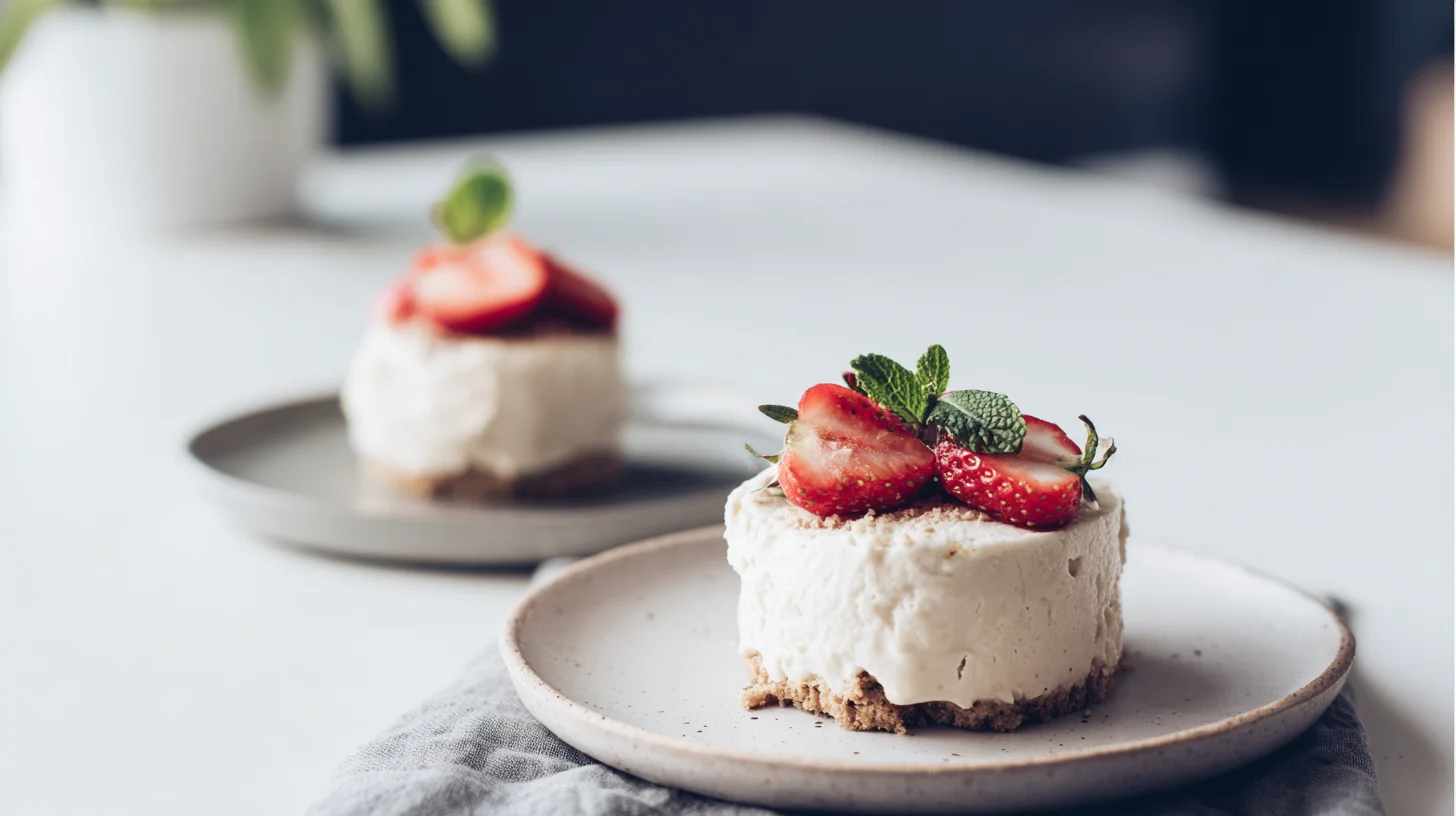
No-Bake Version
If you prefer to skip the oven entirely, try this no-bake cheesecake method instead. Simply press the crust into the cups, fill with the unbaked cheesecake mixture, and refrigerate for at least 4 hours. The texture is slightly lighter and mousse-like. However, they’re just as delicious and require zero baking skills.
Dairy-Free Alternative
Replace the cream cheese with dairy-free cream cheese and use coconut cream instead of sour cream. Make sure all ingredients are at room temperature for smooth blending. The texture will be slightly different but still wonderfully creamy. Coconut-based cream cheese brands work best for this substitution.
Different Sweetener Options
While I prefer erythritol for its clean taste, you can use monk fruit sweetener, alluvin, or stevia instead. Each sweetener has different sweetness levels, so adjust to taste. For best results, use powdered erythritol sweetener rather than granulated for the smoothest texture. You can learn more about different sweetener options here.
Understanding the Nutrition
Each cheesecake cup contains approximately 220 calories, making them a satisfying dessert that fits easily into your daily macros. The majority of calories come from healthy fats, which is exactly what you want on a ketogenic diet. With 20 grams of fat per serving, these cups keep you satiated and help maintain ketosis.
The protein content sits at 5 grams per cup, which comes primarily from the cream cheese and eggs. This modest protein amount won’t kick you out of ketosis. Meanwhile, the net carbs stay impressively low at just 3 grams per serving. This makes them perfect even for strict keto followers.
The almond flour crust contributes healthy fats and a small amount of fiber. Almonds provide vitamin E and magnesium, adding nutritional value beyond just great taste. Furthermore, cheese offers important nutrients like calcium and vitamin A. The eggs provide high-quality protein and essential amino acids, and you can read more about proper egg handling and nutrition.
If you’re watching portion sizes, these individual cups make tracking incredibly easy. There’s no guessing about serving sizes or accidentally eating too much. Each cup is pre-portioned, which helps with meal planning and macro counting. For a lighter option, you might also enjoy this fluffy cheesecake mousse with even fewer calories.
Your Cheesecake Questions Answered
Over the years, I’ve received countless questions about making perfect keto cheesecake cups. Therefore, I’ve compiled the most common ones below to help you troubleshoot any issues. These answers will ensure your cheesecakes turn out perfectly every single time.
Can I make these cheesecake cups ahead of time?
Yes, absolutely! These keto cheesecake cups actually taste better after sitting in the refrigerator for at least 4 hours or overnight. You can make them up to 3 days in advance and store them covered in the fridge. They also freeze beautifully for up to 3 months. Just thaw them in the refrigerator overnight before serving.
Why did my cheesecake cups crack on top?
Cracks usually happen from overbaking or cooling too quickly. Make sure to remove the cheesecakes when the centers still jiggle slightly, as they continue cooking while cooling. Let them cool gradually in the turned-off oven with the door cracked open for 10 minutes. Also, avoid overmixing the batter, which incorporates too much air and can cause cracking.
Can I skip the crust to save carbs?
Yes, you can make these as crustless cheesecake cups. Simply grease the muffin cups well or use silicone liners, then pour the filling directly in. This reduces the net carbs to about 2g per serving. The texture will be slightly softer on the bottom, but they’re still delicious.
What’s the best way to remove them from the muffin tin?
Using parchment paper liners or silicone muffin cups makes removal easiest. If using paper liners, let the cheesecakes cool completely and chill thoroughly before removing. Run a thin knife around the edges if needed. For regular muffin tins without liners, grease very well and let them chill completely before attempting to remove.
Can I use a different sweetener?
Yes, you can substitute erythritol with monk fruit sweetener, allulose, or stevia. Keep in mind that different sweeteners have varying levels of sweetness, so you may need to adjust the amount. Powdered sweeteners work best for the smoothest texture. Avoid sweeteners that crystallize when baked, as they can create a grainy texture.
How do I know when the cheesecakes are done baking?
The edges should be set and slightly puffed, while the centers should still jiggle slightly when you gently shake the pan. They’ll look slightly underdone, but that’s perfect. The residual heat will continue cooking them as they cool. An instant-read thermometer should read 150-155°F in the center when they’re done.
Leave a Reply