This post contains affiliate links. As an Amazon Associate, we earn from qualifying purchases. This means we may earn a small commission if you purchase through our links, at no extra cost to you.
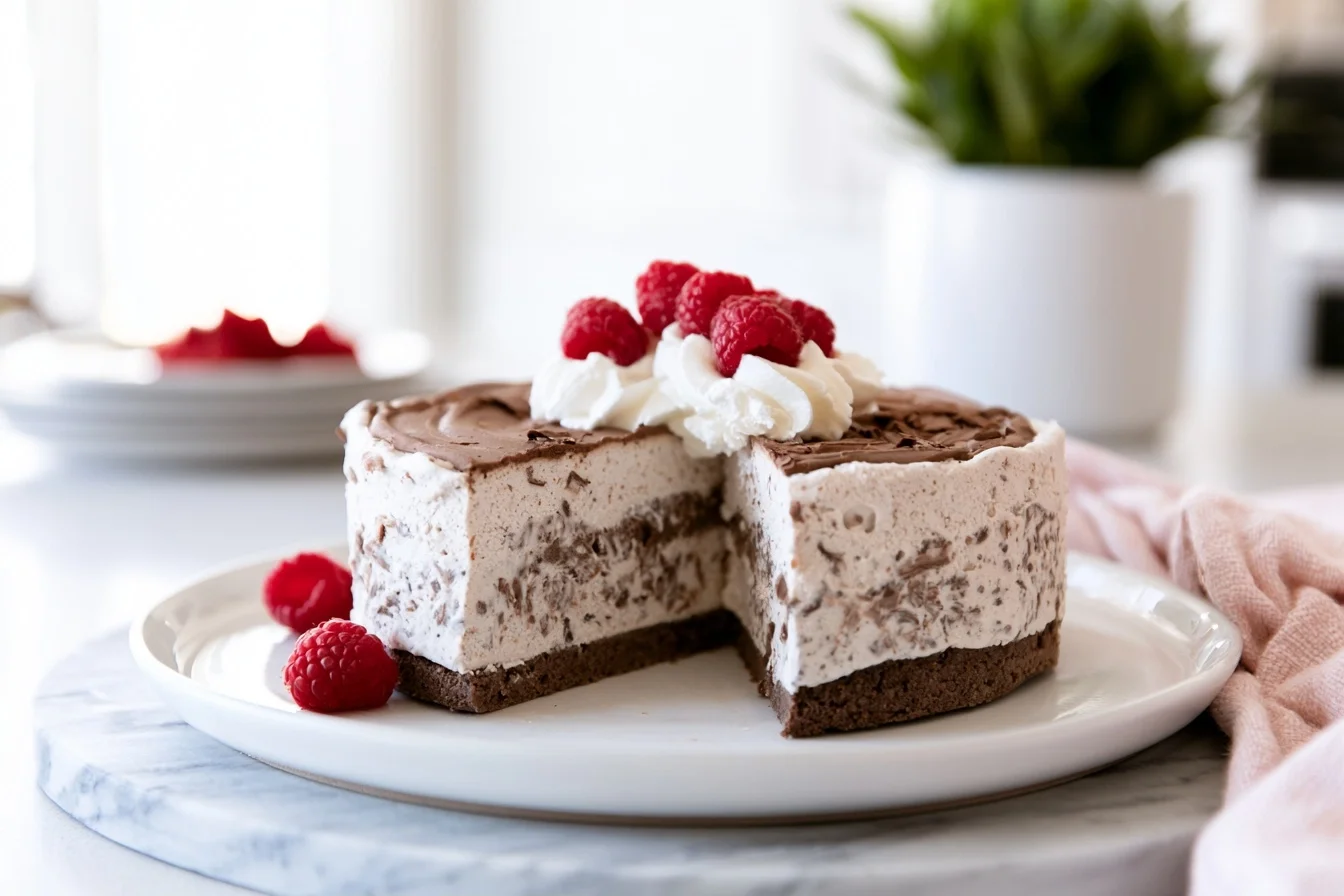
If you’re looking for a show-stopping dessert that’ll wow your guests while keeping your carbs in check, this keto ice cream cake is exactly what you need. It’s creamy, decadent, and surprisingly simple to make at home. Plus, it tastes just like the classic ice cream cakes we all grew up loving, minus the sugar crash.
I remember the first time I made this for my husband’s birthday. He was skeptical that a keto version could match his childhood favorite. However, after one bite, he was completely sold. Now it’s become our go-to celebration dessert for every special occasion.
This frozen treat combines layers of rich ice cream with a chocolatey cookie crust. Therefore, you get that perfect texture contrast in every slice. It’s ideal for summer barbecues, birthday parties, or whenever you need an impressive make-ahead dessert.
Why You’ll Love This Recipe
- Only 4g net carbs per generous slice
- No ice cream maker required
- Completely customizable flavors
- Makes 12 impressive servings
- Perfect make-ahead dessert for parties
Your New Favorite Frozen Celebration Dessert
Keto Ice Cream Cake
12
servings30
minutes0
minutes320
kcalThis stunning keto ice cream cake features layers of creamy no-churn ice cream sandwiched between a chocolate cookie crust. It’s the perfect low-carb celebration dessert that tastes just like the classic version.
Ingredients
2 cups almond flour
0.5 cup unsweetened cocoa powder
0.5 cup butter
0.75 cup powdered erythritol
4 cups heavy whipping cream
2 teaspoons vanilla extract
8 ounces cream cheese
0.25 cup sugar-free chocolate chips
2 tablespoons sugar-free chocolate syrup
Directions
- Prepare the crust by mixing almond flour, cocoa powder, melted butter, and 1/4 cup powdered erythritol in a bowl until well combined and crumbly.
- Press the mixture firmly into the bottom of a 9-inch springform pan lined with parchment paper, creating an even layer.
- Freeze the crust for 30 minutes while you prepare the ice cream layers.
- Beat the cream cheese with 1/4 cup powdered erythritol until smooth and fluffy, about 2 minutes.
- Whip 2 cups of heavy cream with 1/4 cup powdered erythritol and vanilla extract until stiff peaks form.
- Fold the whipped cream into the cream cheese mixture gently until fully combined and no streaks remain.
Notes
- Store covered in the freezer for up to 2 weeks.
- For cleaner slices, dip your knife in hot water and wipe dry between each cut.
- You can substitute the vanilla layer with any flavor extract like peppermint, almond, or coconut.
- If using store-bought keto ice cream, you’ll need about 1.5 quarts total, softened slightly before spreading.
Nutrition Facts
- Serving Size: 1 g
- Total number of serves: 12
- Calories: 320kcal
- Fat: 30g
- Carbohydrates: 9g
- Fiber: 5g
- Protein: 6g
Like this recipe?
Follow @easyketodessert on Pinterest
Tips for Making the Best Keto Ice Cream Cake
Creating a perfect frozen layer cake takes a bit of planning, but the results are absolutely worth it. First, make sure you have enough freezer space cleared before you start. In addition, these helpful tips will ensure your dessert turns out beautifully every time.
Choosing Your Ice Cream Base
You can use homemade or store-bought sugar-free ice cream for this recipe. If you’re making your own, try our classic vanilla ice cream as your base layer. It provides the perfect neutral canvas for other flavors. For chocolate lovers, rich chocolate ice cream makes an incredible middle layer.
Getting the Perfect Cookie Crust
The crust needs to be firm but not rock-hard when frozen. Press the cookie mixture evenly into your pan using the bottom of a measuring cup. This ensures an even layer that won’t crumble when you slice the cake. Furthermore, chilling the crust for at least 30 minutes before adding ice cream prevents the layers from mixing.
Softening Ice Cream Properly
Let your ice cream sit at room temperature for about 10-15 minutes before spreading. It should be soft enough to spread smoothly but not melted. As a result, you’ll get even layers without air pockets. Work quickly once it’s softened to prevent excessive melting.
Freezing Between Layers
Patience is key when building your cake. Freeze each layer for at least 2 hours before adding the next one. This prevents the layers from blending together and creates those beautiful distinct stripes. Therefore, plan to make this dessert over the course of a day or even two days before serving.
Clean Slicing Technique
Run your knife under hot water and wipe it dry between each cut. This creates clean, professional-looking slices. Let the cake sit at room temperature for 5-10 minutes before slicing. Consequently, your knife will glide through more easily without cracking the layers.
Delicious Variations to Try
One of the best things about this recipe is how versatile it is. You can customize every element to match your taste preferences or dietary needs. Moreover, switching up flavors keeps this dessert exciting for repeat occasions.
Fruity Summer Version
Swap one layer for fresh strawberry ice cream to create a refreshing summer treat. You can also add sugar-free strawberry jam between layers for extra fruit flavor. This variation pairs beautifully with vanilla and creates a stunning pink-and-white presentation.
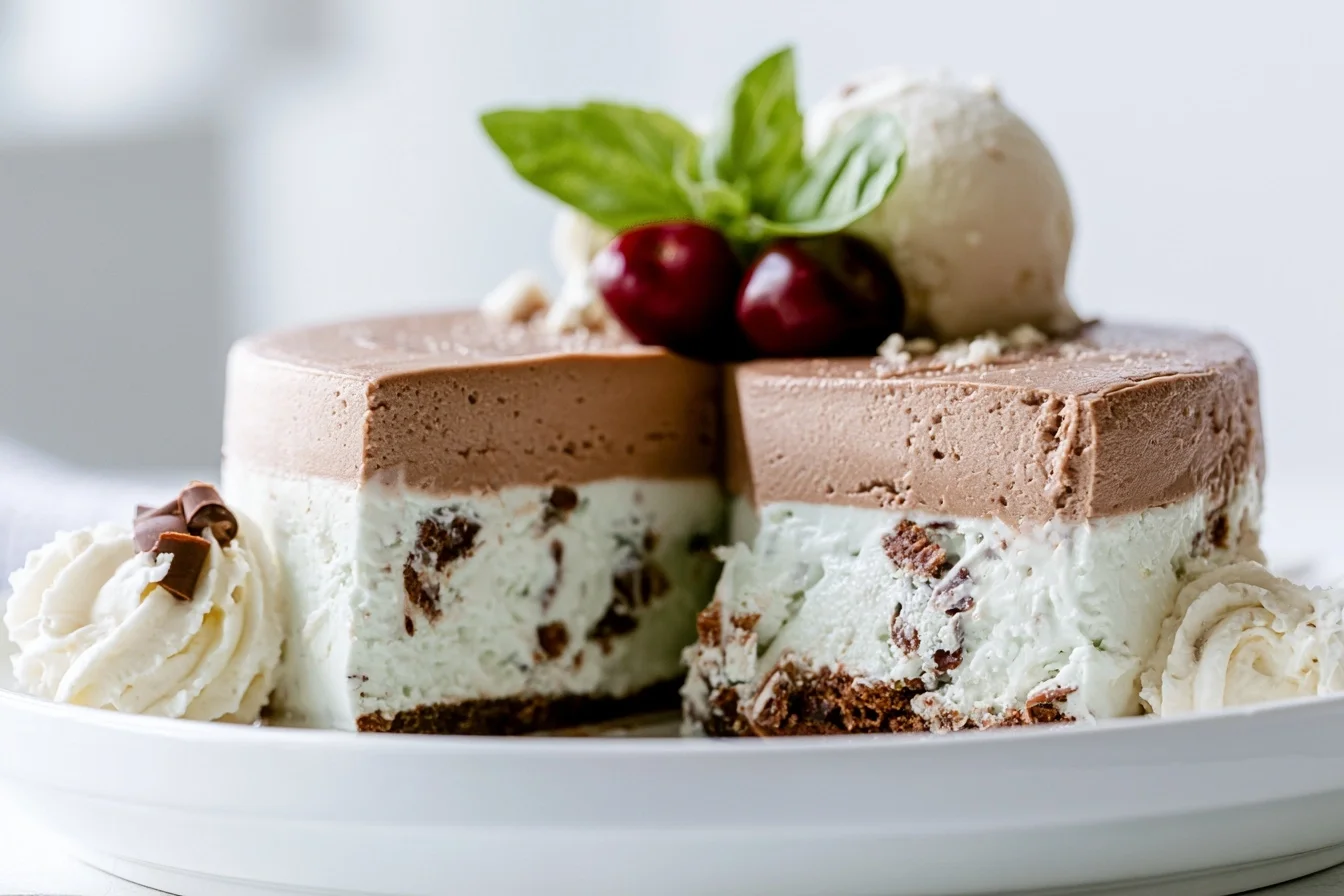
Mint Chocolate Chip Twist
Add 1-2 teaspoons of peppermint extract to your vanilla ice cream layer. Fold in sugar-free chocolate chips for that classic mint chip experience. A few drops of green food coloring make it look even more festive. This version is perfect for holidays or anyone who loves minty desserts.
Peanut Butter Paradise
Mix natural peanut butter into your ice cream base for a protein-packed variation. Drizzle sugar-free chocolate sauce between layers for that irresistible peanut butter cup flavor. Top with chopped peanuts before serving for added crunch and visual appeal.
Coffee Lover’s Dream
Add instant espresso powder to your vanilla ice cream for a sophisticated coffee flavor. Layer it with chocolate ice cream for a mocha masterpiece. This adult-friendly version is perfect for dinner parties and coffee enthusiasts.
Dairy-Free Alternative
Replace heavy cream with full-fat coconut cream for a dairy-free version. Use coconut oil instead of butter in the crust. The texture will be slightly different but equally delicious. Therefore, everyone can enjoy this treat regardless of dietary restrictions.
Sweetener Substitutions
While erythritol works beautifully in this recipe, you can use other keto sweeteners too. Powdered monk fruit sweetener provides excellent results without any cooling effect. Allulose is another great option that freezes particularly well. However, adjust quantities based on your sweetener’s conversion ratio. For more information about different sweeteners, check out this guide on sugar alternatives.
Understanding the Nutrition
Each slice of this keto ice cream cake contains approximately 320 calories. The macros break down to about 30g of fat, 6g of protein, and only 4g net carbs. These numbers make it a perfectly acceptable treat even on strict keto days.
The high fat content comes primarily from heavy cream and butter, which are essential for that creamy texture. These healthy fats help keep you satisfied and provide sustained energy. Furthermore, they’re what make this dessert so rich and indulgent-tasting.
The low net carb count is achieved by using sugar-free sweeteners and almond flour instead of traditional ingredients. Unlike regular ice cream cakes that can contain 60g or more of carbs per slice, this version keeps you in ketosis. Following a well-formulated ketogenic approach means you can enjoy desserts like this without guilt.
The protein content, while moderate, comes from eggs and cream. You can boost it slightly by adding unflavored protein powder to your ice cream base. However, be careful not to add too much as it can affect the texture.
Keep in mind that nutrition values can vary based on the specific brands you use. Store-bought sugar-free ice cream may have different macros than homemade versions. Therefore, always check labels if you’re tracking strictly for medical reasons.
Your Questions Answered
Making a layered frozen dessert can raise lots of questions, especially if it’s your first time. Below you’ll find answers to the most common concerns our readers have shared. These tips will help you troubleshoot any issues and achieve perfect results.
Can I make this keto ice cream cake ahead of time?
Yes, this is actually the perfect make-ahead dessert. You can prepare it up to one week in advance and keep it covered in the freezer. Just remember to let it sit at room temperature for 5-10 minutes before slicing to make cutting easier.
Do I need an ice cream maker for this recipe?
No, you don’t need an ice cream maker at all. This recipe uses a no-churn method that creates perfectly creamy ice cream with just a mixer. You can also use store-bought sugar-free ice cream if you prefer an even easier option.
What’s the best pan to use for ice cream cake?
A 9-inch springform pan works best because it makes removing the cake much easier. However, you can also use a regular 9-inch round cake pan lined with parchment paper. Just make sure the parchment hangs over the edges so you can lift the cake out.
How do I prevent ice crystals from forming?
Make sure to cover your cake tightly with plastic wrap pressed directly against the surface before covering with foil. This prevents air exposure which causes ice crystals. Also, avoid opening your freezer door frequently while the cake is setting.
Can I use store-bought keto ice cream instead?
Absolutely. Brands like Rebel, Enlightened, or Halo Top Keto work great. Just make sure to check the nutrition labels as they vary by brand. Let the store-bought ice cream soften slightly before spreading it into layers for the smoothest results.
Why is my ice cream cake too hard to slice?
If your cake is rock-hard, let it sit at room temperature for 10-15 minutes before slicing. The high fat content means it freezes very solid. Running your knife under hot water between cuts also helps create clean slices without cracking.


Leave a Reply